Pages

Showing posts with label interior design. Show all posts

Wednesday, July 25, 2012

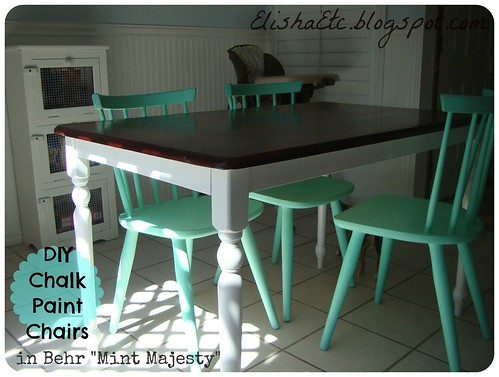
DIY chalk paint dining chairs: a review

After the dining table was completed and in place, it took us weeks to find dining chairs. I was set on finding some metal Tolix style knockoffs, and was probably going to buy some from Overstock.

But then my husband brought home four chairs from a yardsale for just five bucks for the lot.  Yes, the same husband ( I do only have one, afterall) who bought two desks for $10 from a different yardsale.

The four chairs were three matching blond/yellow wood ones (sorry, I forgot to take before pictures!) and a fourth black one (that one lives by the computer now).
behr mint majesty
I've already mentioned our small dining area is a challenge to find furniture for, and it was going to be an even bigger challenge to find the right-sized chair for the teeny dining table.


My husband had intended these chairs to be temporary, and I agreed; I hated their yellow-and-mildew color tones!

But as time wore on, I realized they were just the right size. And, we already had them anyway... time to mend and make do.
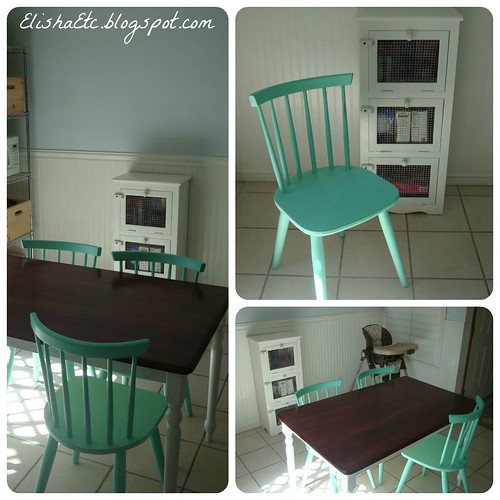
mint chalk paint chairs
First, I tried spraypaint. The Rustoleum Satin Green Apple just wasn't the right shade OR finish. So the lone spraypainted chair sat outside for a few days before I decided what to do next. That decision came to be chalk paint.

I probably don't have to tell you that Annie Sloan Chalk Paint is taking the web by storm. I was totally surprised to find that there's an AS retailer in my town, and was all prepared to pay for it.

But then, I got to thinking... I guessed it was around $35 bucks for a quart of Annie Sloan, and I was pretty close. These chairs were just $1.25 each. It seemed to sort of go against the frugal find that they were if I were to cover them in expensive paint. Plus, there wasn't the right shade of minty green on the AS color chart.

I'd already been seeing all the DIY chalk paint recipes when this post popped up on Apartment Therapy. Most recipes have you mix Plaster of Paris, water, and latex paint in precise measurements and ratios, but the one on AT said the gal kinda winged it until she found a consistency she liked. Works for my lazy artsy, go-with-the-flow self.

I planned on using the lines on the side of my quart container to make pretty precise measurements, and filled Plaster of Paris up to the first line. I thought I was putting water up to the second line when I noticed there was way too much water.

Instead of dumping out the water and PoP to start over like I should have, I went ahead and added my paint, Behr latex paint and primer in one in the color "Mint Majesty". It took a lot of paint to catch up to all the water, and I got a very watery DIY Chalk Paint mixture to work with.

Still, I loved how my first chair came out. I'd done minimal sanding and hadn't technically primed it, which is a supposed benefit of chalk paint-- especially if you're using the real Annie Sloan deal. But it HAD been painted with that apple green Rustoleum, which was acting like a kind of primer.

The next two chairs were another story. With having a little one, I didn't get to do all three at once. So my DIY chalk paint mixture sat overnight. Maybe I should have Googled whether or not leftover DIY chalk paint keeps.

By the next day, the PoP had settled to the bottom in a thick layer. The water was on top. I mixed it up and started painting anway.

I love the color of all three chairs, although I think the first one came out more saturated because of the layer of apple green underneath. But the second two also came out with some large glops of PoP here and there thanks to the day-old mixture. There are brush strokes on the seats, while the first one came out with a smooth seat.

I distressed all three before finishing them off with a couple of layers of Minwax pastewax.

The verdict: I might use DIY chalk paint again, but not for any projects I have in my current queue. This hasn't turned me off from trying the real ASCP, but I think the price for AS has. I like my Behr latex paint and primer in one and plan on mostly sticking with that.

This post is linked at:
Ginger Snap Crafts, Someday Crafts, Southern Lovely, House of Hepworths, Momnivore's Dilemma,

Tuesday, July 24, 2012

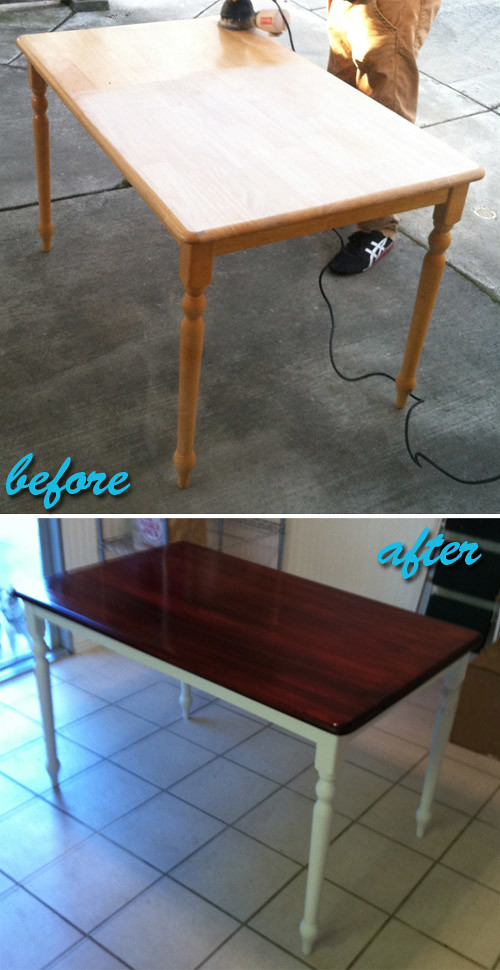
Before & After: Dining Table Makeover

Our dining area in our small eat-in kitchen is a challenge to get just the right-sized table for.

We'd first bought an awesome mahagony table off Craigslist for just $40... and it ended up being way too big.
farmhouse table before after
So we snatched this table up when we saw it at the thrift store. It was priced higher than I wanted to pay for a rinky-dink table like this, even on sale, but it was the right size for the space.

I directed my husband to remedy the yellow/orange wood with a coat of dark stain on the top, and to paint the base white. I'll just say, I would've used different materials than what he chose (spraypaint and all-in-one stain/poly), but it's still pretty close to what I wanted. I wish he would've put one more coat of poly or the stain/poly on top, but I love the color.

I know I usually post a materials breakdown, but I have now idea what either of these colors are! A satin Rustoleum on the spraypaint with no top coat, and the stain/poly in one is most likely by Minwax.

Friday, June 8, 2012

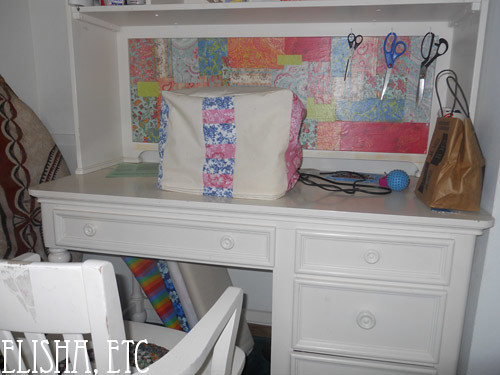
WIP: craft desk & sewing nook makeover

Well, I'm still plunking away at my sewing nook. You may remember I did a DIY wallpaper collage on the back of it. I covered up a non-functional cork board.

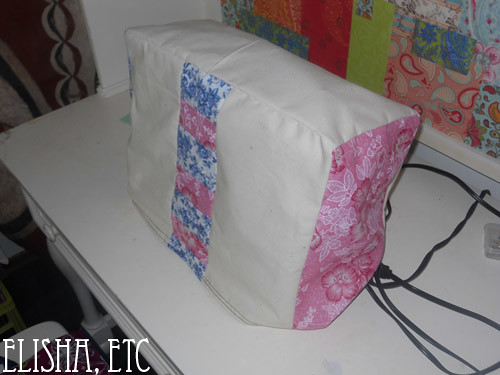
Next order of business was a sewing machine cover.
sewing machine cover1

I basically drew my inspiration from here, but my sides are rectangular instead of trapezoidal. Trapezoidian? Trapzoidular?


They have a free pattern that I followed loosely.

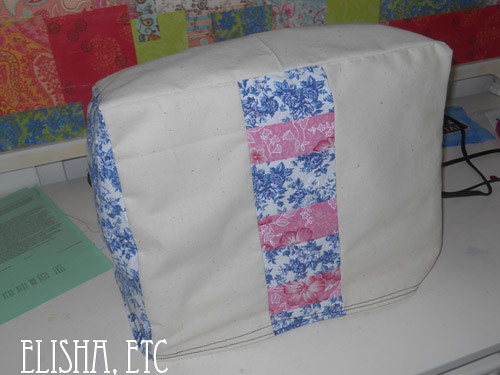
Mine's muslin, not upholstery fabric like theirs, so it's much droopier. But I like it.
sewing machine cover2

When I was researching this project, I came across a lady on a message board who responded to others talking about their own sewng machine cozies who said "why would you want to sew a machine cover? It comes with one..."
  sewing machine cover3
Um, huh? Am I the only one who thinks that's a weird reaction from a person who enjoys sewing enough to own a sewing machine and to be participating in a sewing message board?

In other news, I'm working on Simplicity 2176. Hopefully that's done soon.

Friday, May 25, 2012

Thrifty finds: woah mama!

For all the complaining I do about our local thrift stores on this blog, I was bound to have some good luck sooner or later.
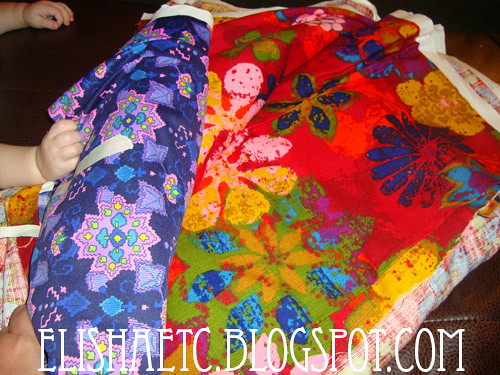
60s fabric
First up, this fabric, which my sweet baby's chunky little wrist is helping to model. To the left is a 100% groovy polyester. It's so totally 60's and much more navy in person.  It reminded me of a more angular Amy Butler print. It's 2 1/2 yards and I paid a buck a yard.

On the right is a whopping 8 1/4 yards of mid-century upholstery fabric. IN LOVE. Paid nine bucks for it, and I can't wait to find the perfect re-upholstery project for it.

I almost titled this post "I will NOT buy more fabric, I will NOT buy more fabric," but it's finds like this that make me glad I don't stick to that mantra. I can't believe I was initially on the fence about buying this fabric!

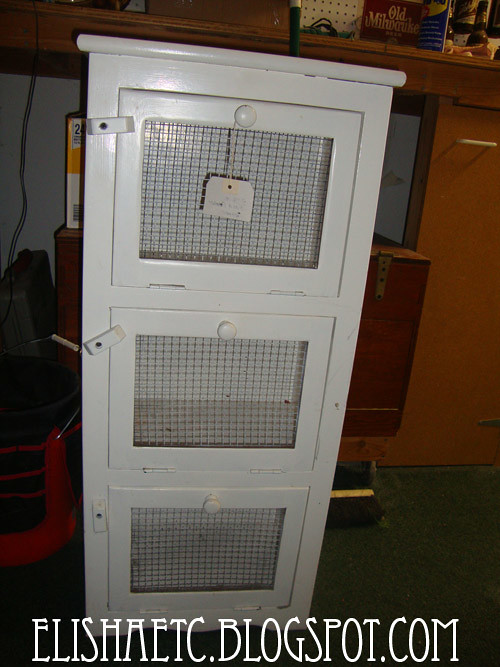
food pantry
I got this sweet little food pantry, which will be great for storing pastas and canned goods. If I didn't need it in the kitchen, it would be great towel storage in the bathroom, or a sewing stuff holder. It was marked $39 and I was all ready to pay that, but it rang up for $27 including tax. Gotta love surprise sales!

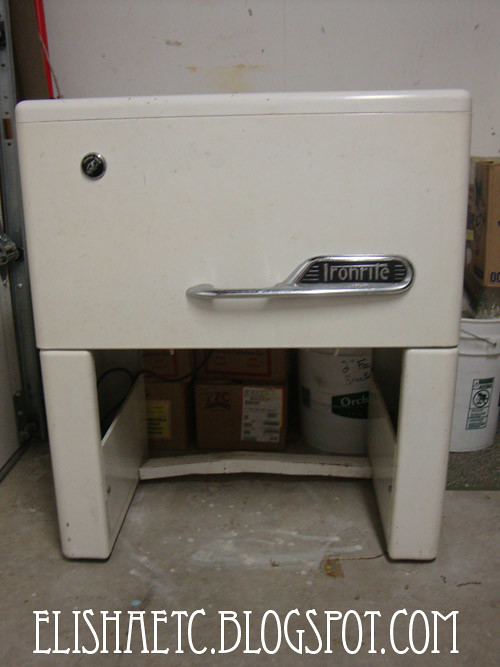
ironrite mangle
Here's the doozy; my husband brought me home an antique Ironrite mangle so I can iron my yardages and quilt tops quickly. I wish I took a picture of the manual-- it has a lady holding an extremely stiff baby girl's dress, like a piece of cardboard. He tells me it was originally $100, but wasn't selling so they marked it 75% off. So he bought it for $25, plus the manual, and the chair.

And, if you're a design freak, yes, it came with the mint condition Ironrite Health Chair (not pictured). Yes, THAT Ironrite Health Chair.

Tuesday, May 22, 2012

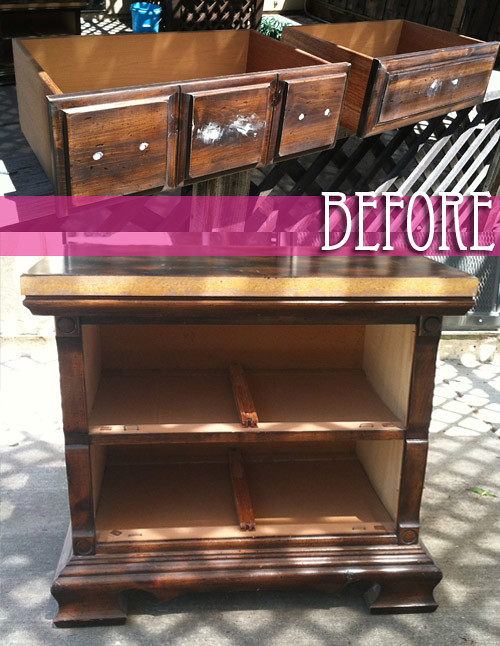
Before & After: nightstand makeover

nightstand makeover before
Shabby chic: ya either love it or ya hate it.

I happen to love it... as long as it's not total overboard like you're living in some countryside Northeastern (1980s) bed and breakfast. I like the muted whites and florals that the look is known for, but I also love color and other graphic prints too much to go full-on with it.

And of course I love vintage, retro, antique... just plain OLD stuff. Always have. So that's perhaps what I find most appealing of all about the SC aesthetic. The aged, loved, worn, and yes, distressed (even it's it's faux distressed) fabrics and woods.

Don't be hatin'.

Among the old things I don't love: 1970s veneer. So when I bought this nightstand, I full intended on painting it all along.

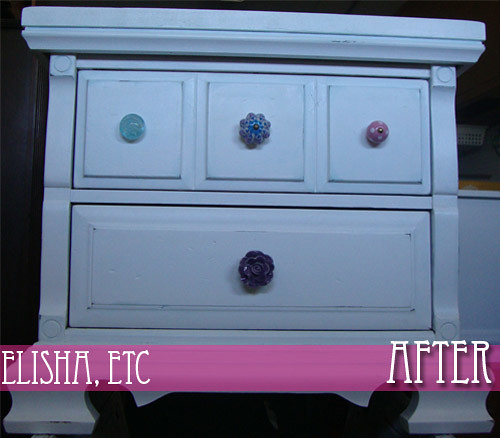
And here she is now!
nightstand makeover after 2
I know you've seen these "white with distressed paint" makeovers all over the blogosphere so it's nothing really special, but I'm really happy with it!

It was my first attempt at making over a piece of furniture. Oh, I've painted plenty of stuff, but I've never sanded, primed, chosen new hardware, done specialty finishes like faux distressing and blue washes, then sealed.

My previous endeavors were "paint over the old paint until you can't see said old paint any longer aaaaannd.. done".

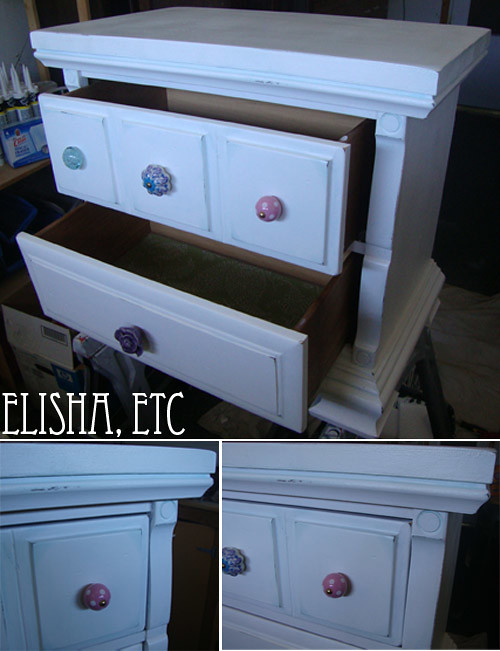
It'll now live next to my bed and probably hold some sewing stuff spilling over from my craft nook. I hope I get to do more projects like this in the future! nightstand makeover after 1
White Nighstand Makeover
Nightstand: veneer and wood nightsand (~16.50 - thrift store)
Hardware: mismatched knobs (~15 - World Market)
Paints: white primer and latex paint in one (husband chose it! $14 for full can used on two night stands - Home Depot), Minwax past wax (~$10 - Lowes)
Total cost: ~48.50

Tuesday, May 1, 2012

Project inspiration: wallpaper collage walls

UPDATE: here's the project I based on the following inspiration images... enjoy!


I've been in luurrrrve with these wallpaper collage walls since I first spotted them on teh interwebz last year, probably on Design Sponge.

In fact, I'm pretty sure they're among the first things I pinned when I joined Pinterest "40 weeks ago".

I love the quilt-like look it achieves-- and that you don't have to pick just one wallpaper!

They're done using wallpaper sample books, and since you probably don't have to hang them as straight as using just one type of wallpaper, they're easier to hang, too.

While I don't think my husband or landlord would be down with me replicating them in our home, I've figured out how to achieve the look on a much smaller scale. Keep an eye out for that project.

But first, the inspiration...
Source: flickr.com via Elisha on Pinterest

Wednesday, April 18, 2012

Project: DIY Retro Bread Box

Please excuse the blurry iPhone photos, I promise better photography in the near future.

I've already shown you the inspiration for this and told you all about how I've wanted a vintage enamel bread bin but can't quite seem to afford one. (And lest you cry out "but I always see them in my thrift stores," here's where I complain that my neck of the woods just does NOT have good thrift shops).

I racked my brain for a while on how to paint letters onto a readily available metal bread box. What kind of food-safe enamel paint would go on neatly? And how do I get it to not look so much like a stencil, just like my inspiration?

But first, the box. I found this cute retro bread box on Amazon, and for the longest time, that was the one I planned on buying... until I saw the one above at Target for about $15 cheaper. The garage-door-style one above isn't exactly the style I wanted, but I couldn't pass it up for the price. I may still buy the Amazon one at some point. Sorry, they longer have this one at Target for me to link to.

And now, the solution to retro-fy it... vinyl stick-on letters. They're a true black and a good font for the look I was going for. They're just permanent enough, but not too permanent that I couldn't preposition them. Yes, they're crooked in the picture below. That's the beauty of it; after this picture was taken, I straightened them out. And then was too lazy to re-take the picture.

These basic black ones I found at Wal-Mart in the poster section for I think about $3.99, maybe even $2.99. But I saw similar ones at Office Depot in different colors and fonts, which might be fun to try also! It looks like Amazon has some too.


DIY Retro Bread Box
Materials: bread box ($17.99 - Target), vinyl letters (~ $3.99 - WalMart)
Total cost: Under $25

This project is linked at:
The Frugal GirlsI Heart NaptimeUnder the Table and DreamingSew Many WaysPetite HermineNifty Thrifty ThingsLamb AroundHomemaker on a DimeRaising MemoriesMy 1929 CharmerFlamingo Toes, Sumo's Sweet Stuff, Making the World Cuter, Craft-O-Maniac, Sew Can Do, Delicate Construction, Mad in Crafts, Creating my Way to Success, KDBuggie Boutique, Tip Junkie, Today's Creative Blog, Vintage WannaBee, Creative Itch, Ladybug Blessings, Funky Polka-Dot Giraffe, Ginger Snap Crafts, Polka Dots on Parade, Lil Luna, Someday Crafts, Southern Lovely

Monday, April 2, 2012

Where to buy a hobnail jadeite cake stand?


Doesn't the Meadowbrook Farm have the most gorgeous kitchen? Check out her Jadeite collection if you haven't already...

Thanks to this post, I am getting tons of hits from people looking for places to buy a hobnail jadeite cake stand.

The answer is... I don't know. Which is why I wrote the post in the first place.

The obvious choices are eBay, which will have both vintage and reproduction jadeite cake stands from time to time, as well as Etsy and your local antique stores and dealers.

If you're willing to do without the hobnail, Amazon has repro jadeite stands.

My choice is still, as I mentioned in my previous post, Fishs Eddy, which doesn't just have new jadeite... it also has new stuff that looks like vaseline glass, cobalt depression glass, and blue milk glass cake stands.

Friday, March 30, 2012

The Pinterest Problem: an update

Apparently I'm one of the only people to talk about Pinterest's copyright issues and other problems, or one of the first to anyway, because my October 2011 post "The Pinterest Problem" continues to get hits-- especially as the site grows.

And apparently it's a hot topic, because Pinterest has updated it's Terms of Service.

Of note, an update relevant to my previous post:
We released simpler tools for anyone to report alleged copyright or trademark infringements.
They're also apparently outlawing Thinspo or Pro-Mia type pictures (I did notice some of those disturbing pics on there last year, amid the chevron-print cookies and DIY chair makeovers) and paving the way for private pinboards. Private pinboards, that annoys me... isn't the point of Pinterest to share and discover new things that others have pinned?

Finally, they pulled a reversal on their previous "NewsCorp buys MySpace" type of service term:
Our original Terms stated that by posting content to Pinterest you grant Pinterest the right for us to sell your content. Selling content was never our intention and we removed this from our updated Terms.
I'll end this post by first pointing out that the site is now getting much, much more attention from mainstream media as opposed to just from shelter, fashion, food and tech blogs. I now have twice as many Facebook friends on Pinterest compared with when the year began. Changes are bound to come with such attention.

And, since I hate doing posts without pictures, here are some of my most recent pins:


Project inspiration: retro bread boxes

UPDATE: Here's the post with my DIY Retro Bread Box based on the following vintage bread bins.

I've been pining away for one of those vintage enamel bread boxes with the word "BREAD" emblazoned across them for a couple of years now.

It all started when I thought I would get into making my own sourdough bread, and I was looking for the best way to keep it once it'd been made. Metal bread boxes turned out to be the answer.

My sourdough starter died, but my desire to own a metal bread bin did not.

Too bad the kind I like mostly start in the 60 dollar range.

I've pinned a bunch on my kitchen Pinterest board, hoping to DIY one for much cheaper. I've come up with a decent solution, but before I show you the project, I wanted to share some of my inspiration...


Sunday, December 4, 2011

WIP: "Robot and rockets" rag quilt for boy's room

It's been a few since I talked about sewing and about my son's "Robots in Space" bedroom, so here's a post on both. Although, the sewing I'm talking about here is not apparel sewing.

I've been collecting fabric for a robots/rockets/space quilt, and I'm sew, sew stoked on it.

Cotton robot fabric, and sheets to use as quilt fabric, are actually not that hard to find, but I want LOTS of it, and different colors and variations. Rocket fabric is even easier to find, and space fabric is even easier to find than rockets.

Not as easy to find; robot, rocket, and space themes in flannel. This will be my first return to quilting in years, and I plan on keeping it simple with a cotton on top, flannel on the bottom rag quilt. But that doesn't mean I want the bottom to be boring.

I did find these AWESOME flannel rocket sheets from Gannet Hill:

Those are GLOW-IN-THE-DARK! Glow-in-the-ever-loving-dark-flannel-sheets! LOVE. The bummer: at $54.00 for the twin-sized set, I am not ready to buy them and hack them up for fabric. That doesn't sit well with my fru-girl ways.

The good news: I have managed to grab a couple yards of theme-aprope flannel, and am bidding on some more on eBay. All of the cotton has been secured for the top, and I'll snap a picture when I get a chance.

In the meantime, here's some more cotton sheets for the "Robots in Space" or "Robots and Rockets" boy's room, if you landed here looking for bedding for a boy's robot room. (Just click the link in the Pinterest caption, and then follow the link on Pinterest.)


Slightly more affordable, but out of stock:
Source: target.com via Elisha on Pinterest


Source: target.com via Elisha on Pinterest


Now THESE are what I'm looking for! Affordable, cute... aaaaand out of stock. Wah waahhhh.

Saturday, October 22, 2011

Is sewing cheaper than buying?


Is sewing cheaper than buying?

The general consensus on the Internet seems to be "no", not at all. They'll tell you to buy clothes instead at WalMart, JCPenny, Target, or the thrift stores. They'll tell you patterns and fabric cost too much, not to mention the notions. They say they buy a shirt on clearance, only to go to JoAnn and find the same fabric going for the full price of the shirt!

I disagree. I believe these people have only slightly looked into sewing, or not at all.

My answer to "is sewing cheaper than buying?" is: IT DEPENDS.

Many of those in the "no" camp seem to be frugality and money bloggers as opposed to sewing and craft bloggers. And they're definitely taking the wrong approach to sewing.

Here's what I mean by the wrong approach to sewing: it seems those who say "buying is always cheaper than sewing, no matter what" are picking out a pattern, and then picking out full-priced fabric. Many times this pattern/fabric combo is based on a shirt or dress they've already seen that they're trying to duplicate. Instead, those interested in sewing to save money should be stocking up on patterns while they're on sale, and matching fabric as they come across it.

Of course, my sewing machine was a gift, but I've seen them pretty cheap at garage sales and thrift stores,  and even free on Craigslist. The following lists assume one already either has a sewing machine or access to one.

SEWING CLOTHING IS CHEAPER WHEN:
You're into runway and high fashion.
Couture is expensive. Sewing can be, too, but rarely will you drop hundreds or thousands on an outfit. Hands down, the most inexpensive way to get a custom, made-for-you outfit is to sew it yourself.

You're into more expensive clothes in general.
Even if you're not into one-of-a-kind, custom clothing as above, but are into pricier items such as vintage clothing or clothing from places like Anthropologie, sewing can be cheaper.

You want quality clothing.
This assumes you're a talented sewer or the potential to become one. I LOVE Target, but one my $5 clearance maternity tops started coming apart after one wash. I'd like to think I could sew a top that will hold together much better for about the same price in fabric.

You're a unique size or shape.
I recently took my back waist measurement, and it was a good two inches longer than even the largest pattern size. I guess I should add that I'm pushing 6-feet-tall. That means that anything I buy off the rack runs the risk of showing my midriff or having the waist part fall way above where it should be. That's just the start of my problems; my figure is also rather manly. If you have shorter legs, a deep crotch, or a tiny waist and big bust, sewing may be for you. Especially if you buy clothing only to run to the tailor to have it altered.

You like to be "different".
Unless you're copying a look or using an inspiration piece, sewing guarantees you have a one-of-a-kind dress that no one else will have-- without having to, again, spend the custom price.

You purchase fabric on clearance, from thrift stores, or garage sales.
Or you buy sheets, tablecloths, or curtains on sale at the thrift store or from garage sales to use as fabric. This requires patience and an open mind. You can save bundles on material by waiting for the right material to come along, instead of seeking out a specific fabric based on print and color.

You live in an area like mine, where thrift stores are scarce and overpriced.
I've addressed this before: often, buying clothing from a number of Bay Area thrift stores will be just as expensive as purchasing it from Target or Ross. And nine times out of ten, the dated thrift store clothing won't fit me properly anyway. Our thrift stores are paying higher rent, and, thanks to our proximity to Silicon Valley, those working there are very Internet savvy and can quickly find the value of things (that's why I saw a tiny Pyrex dish for seven bucks yesterday). Depending on what part of the country you live in, thrifting your clothes may indeed be a better buy. For me, I'll stick to thrifting for just home goods and furniture.

You buy patterns on sale.
Most of the time it is easy to buy them for 99 cents. I read one account by a person who said she saved by making her own patterns from paper grocery bags; if only she'd known how cheap an actual pattern can be! You can't even buy the paper for 99 cents sometimes. If your pattern isn't on sale, find a similar one that is. Keep in mind a pattern is usable more than once.

You enjoy dresses, skirts, and slacks more than jeans and T-shirts.
If you work in a dirty environment where your clothes get thrashed, it's probably not a good idea to invest a lot of time into making them.

You want to be green.
I'm not saying all sewing in greener. That new fabric at the craft shop has to manufactured in some factory, and shipped in on big boats or trucks. But if you're using thrifted fabric, old sheets or curtains laying around, or up-cycling thrift store buys, then yes, you're giving new life to an old item. This is the slow clothing movement, and it can be much cheaper than buying bamboo T-shirts (which are very expensive even wholesale, as I recall from when hubby worked as a screenprinter) or hemp dresses. Of course, buying clothes from the thrift store is pretty green too. But, even if you're buying new fabric, you can rest assured that your garment isn't being made in a sweatshop, like most ready-made clothing items.

You are a creative type, or you have "the eye".
It doesn't matter how straight you can sew, how cheaply you buy the material, or how talented a seamstress you become. If you can't match co-ordinating fabric or pick out the correct color bias tape for your garment, you're not going to end up with something pretty, and it may be better to just buy off the rack. This is subjective, of course, and as long as your happy with your finished product, that's all that matters. But you're not going to save any money by sewing if you don't like what you've sewn and always leave it hanging in the closet.

You view sewing as a hobby.
How much money are you plunking down on new Apple gadgets, only to find them obsolete next month? Do you get to wear that photography hobby out to dinner? Will that vacation to Costa Rica provide you years of wear? Didn't think so. Sewing is a hobby, for many, a rewarding one. If you look at the money you're spending as hobby money, it shouldn't bother you so much. Especially when you realize that with this hobby, you're given something tangible and useful.

BUYING CLOTHES IS CHEAPER WHEN:
You're buying clothes for children...
who will outgrow the clothing quickly, and you don't have to worry as much about quality. You saw my story about my Target maternity buys above. My son grows out of clothes so quickly, the seams don't even have time to come apart. Plus, I can buy most of his stuff on clearance at Target for under $3. There's no way I can match that. I, on the other hand, stay close to the same size, so I can wear my sewn garments for some time.

You're a jeans and t-shirt kinda guy or gal.
Or sweatshirts and overalls. You get the idea. Sewing clothing should be for those who work in an environment where they're expected to wear nicer clothing, or for those who prefer to wear skirts, dresses, etc.

You're sewing for a man.
Let's face it, I'm not going to be able to, nor do I want to, duplicate my husband's cutoff cargo shorts and Danzig shirt. When he does need button downs and slacks, he'll get a much better buy at Ross or TJ Maxx.

You need maternity or other temporary wear.
Sewing can save you money when you can wear the garment for a long time, and get a lot of use out of it. For the same reason I advise not to bother sewing for children because they'll outgrow it quickly, it's probably best to save money by not sewing adult clothing that won't be used more than once or twice, or will be used for just a few months. The exceptions would of course be costumes and formal wear.

You're in the market for sturdy handbags and other accessories.
Some of the complaints I read about sewing not being all that frugal said that the individual started off by sewing purses and found that buying them would be cheaper. So stop sewing purses.

You don't like to sew!
No amount of money saved is worth frustration and tears if you're not going to enjoy yourself. It's a hobby. But it may not be for you, especially if you see it as a chore. If that's the case, save yourself the headache and stick with off-the-rack!


My answer on the economics of sewing bedding, curtains, and other home decor is the same: it depends. If you need a duvet cover, or your tastes run more expensive, I recommend sewing, especially if you have unused materials laying around such as flat sheets. I, however, will never sew a fitted sheet. It of course can be done, but I won't be bothering with that for the price I can find nice, high thread count fitted sheets for at stores like Marshall's. But I plan to sew most of our curtains (I can do these Anthro ones for much cheaper and with much cuter fabric), so our home linens will be a mix of purchased and sewn.

Still not sold? Just check out some of the garments Mena from The Sew Weekly whips up. I use her as an example because she provides the total price of each garment, sans labor time (remember, it's a hobby). We're talkin' six bucks, fourteen bucks, and thirteen bucks. These are entire dresses. There are a couple of exceptions (66 bucks, yikes)!

Bottom line: if you're a "clothes make the man" kinda guy or gal, a good shopper, and think you have the ability to sew well, sewing clothes may be cheaper for you. If you're a jeans, sweats, tees and basic tops kinda person who has a fit-model type of body that is easy to find clothes for, off-the-rack is for you. On home items, a pretty, high-quality duvet cover and curtains will almost always be cheaper to sew, while fitted sheets and pillow cases may be better to purchase.

Do you agree with me?

Tuesday, October 18, 2011

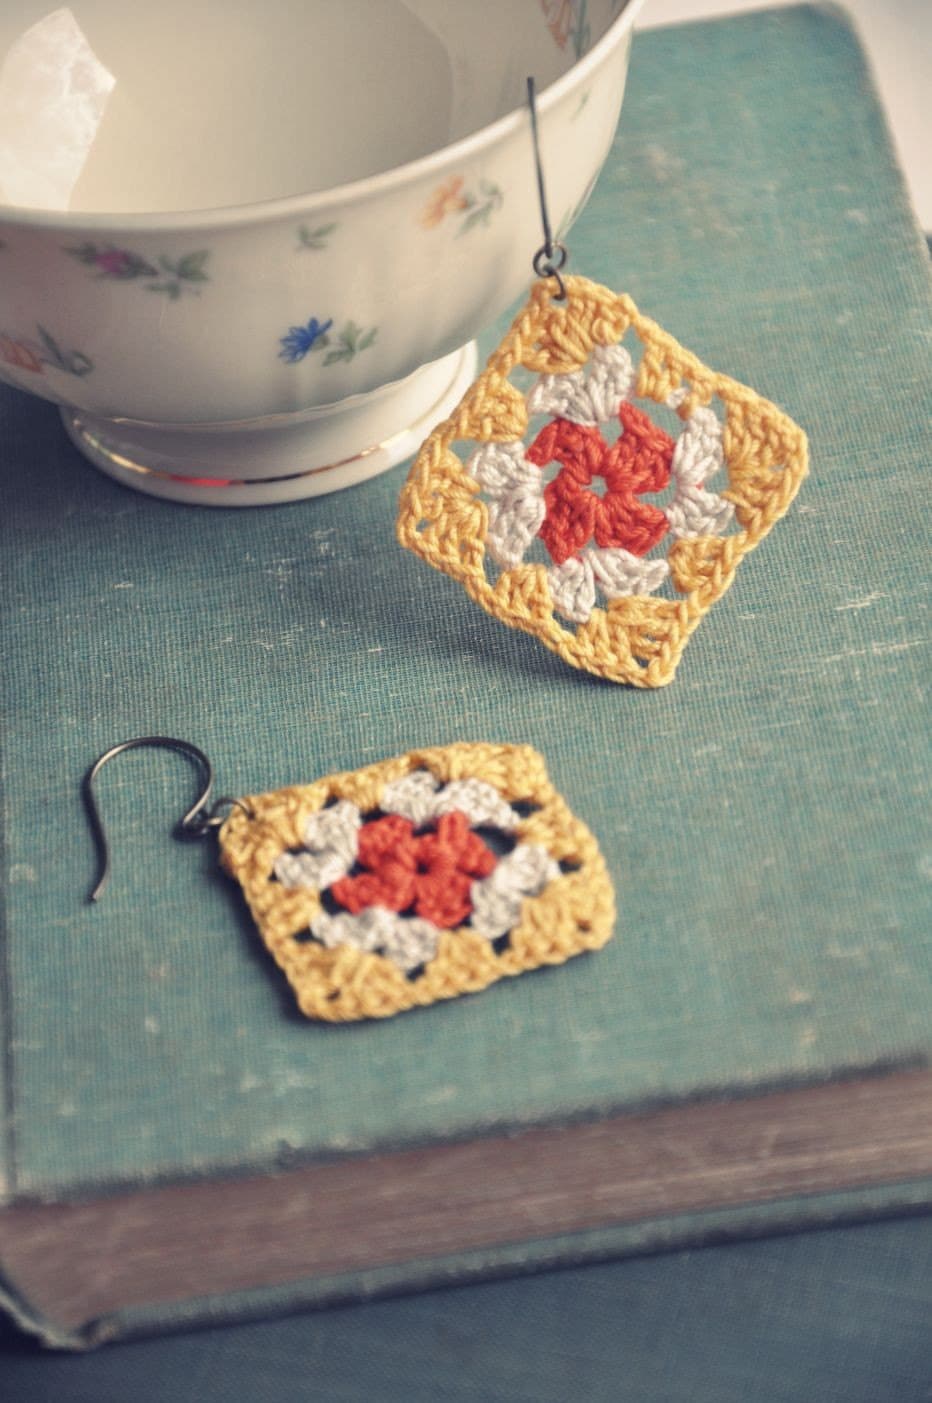
Roundup: Granny Chic

No explanation needed, I think. I just totally lurrrrve Granny Chic. Think cross stitch, doilies, and crocheted granny squares...

Source: bhg.com via Elisha on Pinterest


Related Posts Plugin for WordPress, Blogger...